
End Time is one of the three heroic dungeons introduced in World of Warcraft Patch 4.3. The dungeon contains 3 boss encounters (the first 2 bosses are randomly chosen out of a possible 4, while the last boss is always the same). Each of the first two bosses drops one epic item of 378 item level, while the final boss drops two items, as well as a Chaos Orb.
This dungeon, along with the two subsequent heroic dungeons, Hour of Twilight and Well of Eternity, takes players on an epic journey, alongside such important lore characters as Nozdormu, Thrall and Illidan. The final goal of this is to bring the Dragon Soul, a powerful artifact, into the battle against Deathwing.
Table of Contents
1. Introduction ↑top
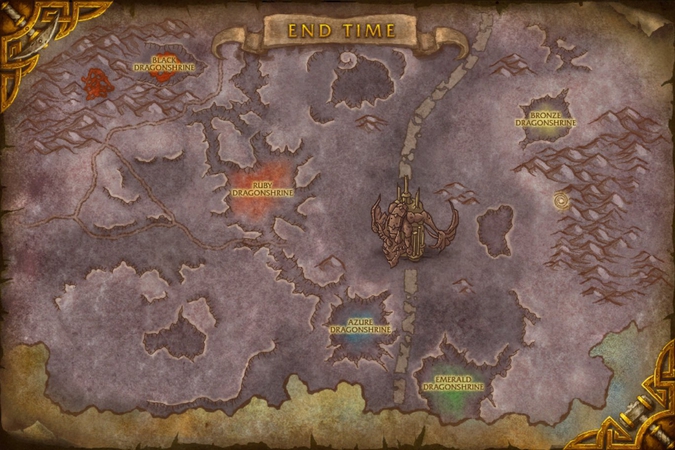 The End Time heroic dungeon is accessed from the Caverns of Time instance hub, and it is also accessible through the Dungeon Finder. The instance has a linear layout, meaning that, in order to complete it, you must defeat the 3 bosses you will be faced with in a pre-determined order. The first two bosses are randomly picked from among four possible choices and the last boss is always the same.
- Possible choices for the first two bosses:
- Last boss: Murozond.
In this guide, we will cover all of the potential first four bosses and their trash mobs, as well as the final boss.
Finally, there are two quests related to this dungeon. They are part of a longer quest chain, that spans over all three heroic 5-man dungeons added in Patch 4.3.
2. Loot ↑top
3. Quests ↑top
4. First Two Bosses ↑top
The first two bosses are randomly chosen from among four possible bosses, each having their own Dragonshrine:- Obsidian Dragonshrine: Echo of Baine;
- Azure Dragonshrine: Echo of Jaina;
- Ruby Dragonshrine: Echo of Sylvanas;
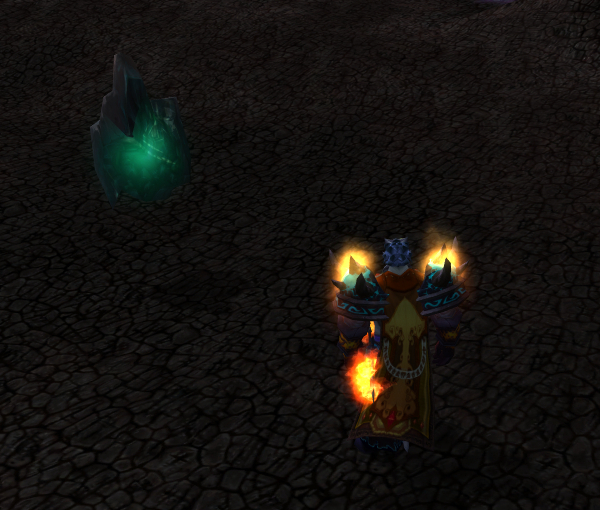
- Emerald Dragonshrine: Echo of Tyrande;
4.1. Obsidian Dragonshrine: Echo of Baine
The Obsidian Dragonshrine is home to the Echo of Baine. Before reaching the boss, there are a few optional packs of mobs that you can dispose of if you really want to.4.1.1. Trash
 These mobs are susceptible to the regular forms of crowd control, and your party should aim to use crowd control on one mob in each trash pack. You can choose to ignore these mobs and go straight to the boss (make sure not to accidentally pull aggro). Otherwise, they are not very challenging to defeat.
Regarding the area where you will fight the trash, it is important to notice the numerous small patches of travelling fire, located on the ground. These move slowly, and coming into contact with them will cause a rather high amount of damage to you, in addition to leaving a damaging (and dispellable) DoT. These fire patches can be the cause of many avoidable deaths, so you should pay attention to them.
4.1.2. Echo of Baine
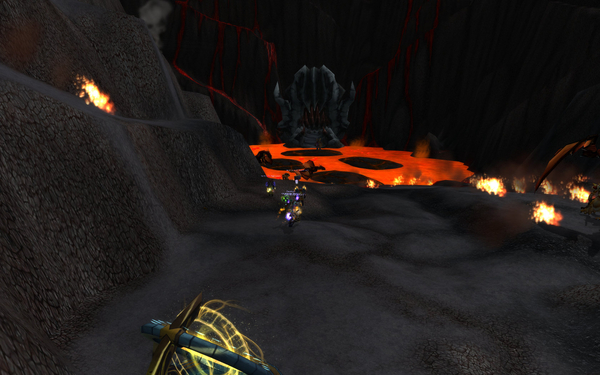
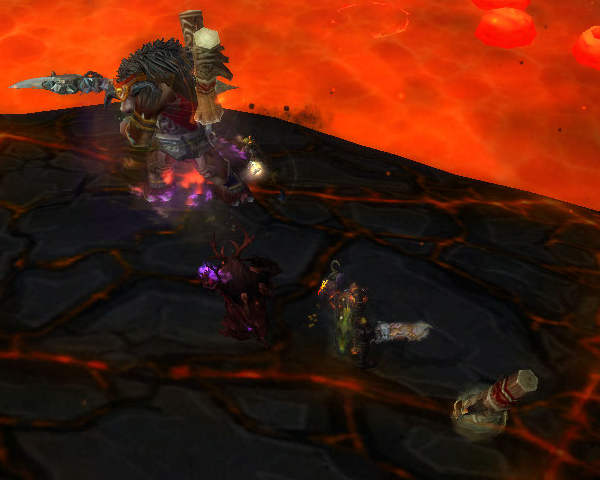
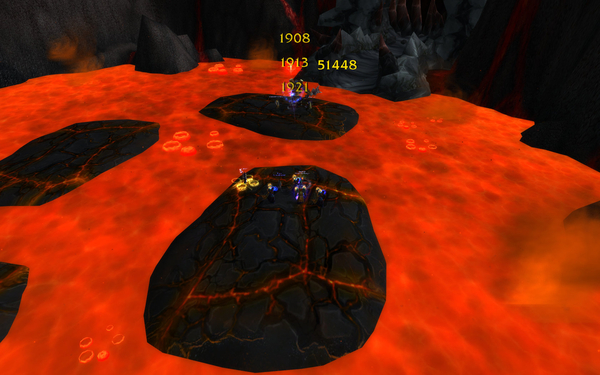 Echo of Baine is located on one of 4 platforms, in a pool of lava. The lava deals damage, so you will need to engage and fight the boss on the platforms. The fight is a tank and spank fight but has a specificity: every 50 seconds, Baine targets someone and destroys the platform on which they are standing (
 Pulverize). As there are only 4 platforms, this serves as a soft enrage timer.
Basically, the strategy is to nuke him down and move to a new platform if yours is destroyed.
The fight really is not more complicated than this. However, if you want to optimise your performance, here are a few tips:
- Have the ranged players spread out on multiple platforms so that not everyone has to move when a platform gets shattered.
-
Baine can take an extra 50% damage for almost the entire duration of the fight. To achieve this, you need to watch out for when he throws his totem (
Throw Totem) at a random player (that can never be the tank). This knocks the player back (unless they move promptly), most often into the lava, but the totem remains on the ground and can be picked up by anyone. After picking up the totem, you need to target Baine with it.
- Players who come into contact with the lava deal 10,000 extra damage with their melee attacks for 20 seconds (
Molten Fists).
- Healers and tanks need to be aware of the 10,000 extra damage that Baine deals with each melee attack, for 10 seconds, after coming into contact with the lava (
4.2. Azure Dragonshrine: Echo of Jaina
The Azure Dragonshrine houses Echo of Jaina. Before she can be engaged, however, you will have to collect the 16 fragments of Jaina that are scattered around the dragonshrine.4.2.1. Trash
 While it is possible to gather all the fragments without engaging the patrolling trash packs, it is advised to dispose of those that are in the proximity of Jaina, so that they do not interfere with the final fight.
The trash packs themselves are not problematic. Each pack is made up of a seemingly random combination of fallen Lordaeron soldiers:
The Priests should be killed first, as they place Lightwells and heal other mobs. These mobs are Undead and they are susceptible to the regular forms of crowd control.
4.2.2. Echo of Jaina
Even though Jaina has a few abilities of concern, the fight belongs to the tank and spank category. She constantly damages the tank with Pyroblast (not interruptible), but does not perform melee attacks, and will often blink away (
 Blink), making it essential to keep her at a safe distance from remaining patrolling mob packs.
 While the fight presents no complex mechanics, Jaina's abilities must still be dealt with in a proper fashion (especially
  Flarecore, which will wipe the party if not properly managed). Flarecore throws a sort of fireball at the ground, near a random player. The fireball must be detonated by walking through it. The later it is detonated, the more damage it deals to the player who detonates it. After 10 seconds, the fireball explodes and deals very high damage to the entire party.
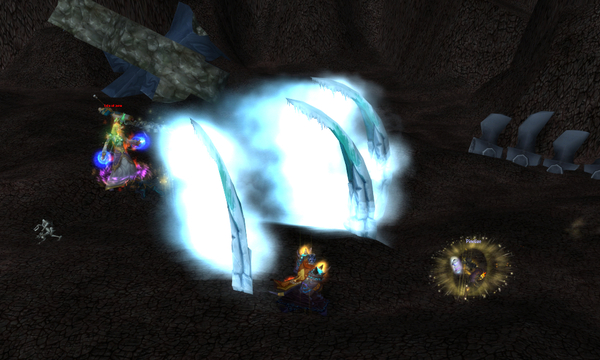
 Frost Blades creates three blades of frost in front of Jaina. They travel forward and any player who gets touched by them is stunned for 5 seconds.
 Frostbolt Volley is a standard, interruptible Frostbolt Volley.
4.3. Ruby Dragonshrine: Echo of Sylvanas
In the Ruby Dragonshrine, you will find Echo of Sylvanas. Before reaching the boss, however, you will have to defeat several groups of Undead trash mobs.4.3.1. Trash
The trash in the Ruby Dragonshrine is comprised of several pack of Undead ghouls. They stack some bleed effects on the tank, and they enrage themselves, although they are not problematic.4.3.2. Echo of Sylvanas
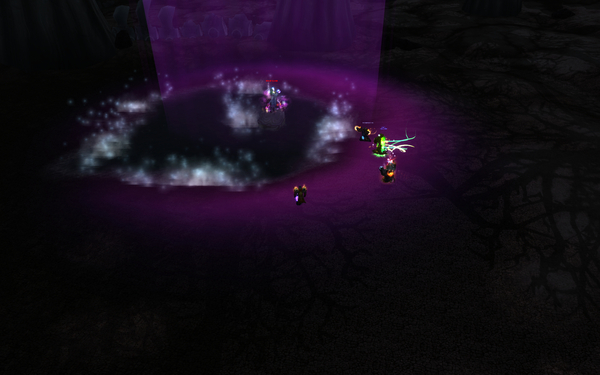
The fight against Echo of Sylvanas is quite simple. Essentially, you will want to spend the entire fight spread out, as many of her abilities have an AoE component. Additionally, your party will have to perform a specific task, once or twice during the fight.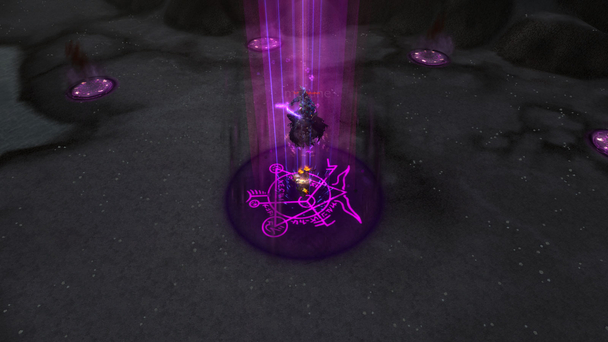 The biggest challenge of the encounter comes from Sylvanas'
  Calling of the Highborne ability. Sylvanas will fly up in the air, and pull the entire party in a stack, beneath her. Once pulled in, players are then free to move.
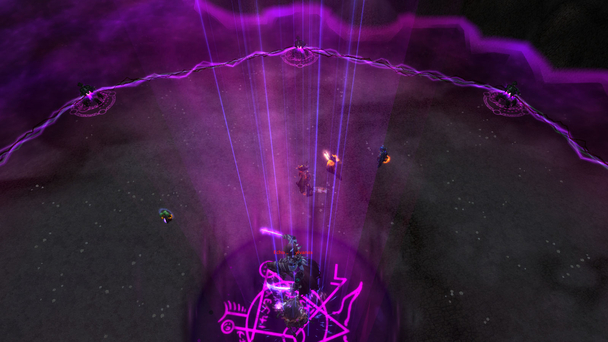 Sylvanas then summons a number of ghouls, in a circle around her. The ghouls will start to slowly move towards Sylvanas. A line links all of the ghouls, and crossing this line or entering the area behind the ghouls will deal heavy Shadow damage to you. Obviously, as the ghouls close in towards Sylvanas, the safe area becomes smaller and smaller.
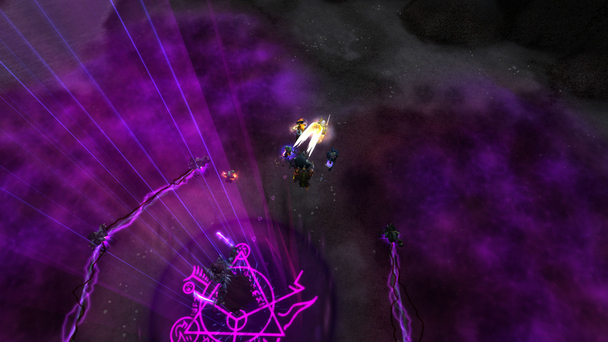 If the ghouls reach Sylvanas, you will instantly wipe. Fortunately, it is sufficient to kill a single one of the ghouls in order for the others to become harmless. Therefore, it is important to choose a single ghoul to focus on. Once this ghoul dies, the link between them is severed and the encirclement is broken, allowing you to safely exit it.
In addition to this, Sylvanas deals damage to the tank and the party with a variety of abilities:
Black Arrow and
Unholy Shot damage a random player and others within 10 yards.
Shriek of the Highborne damages and slows a random player.
Blighted Arrows places damaging void zones on the ground that need to be avoided.
4.3.3. Achievement: Severed Ties
 Severed Ties is an extremely straightforward achievement. It requires your group to kill two ghouls during a Calling of the Highborne. It only requires that your group's DPS is high enough, and that the ghouls are properly designated so no DPS is wasted on other targets.
We advise setting ground markers for the spawn locations of the two ghouls that you wish to kill, as this will save time when they spawn.
4.4. Emerald Dragonshrine: Echo of Tyrande
The Emerald Dragonshrine is home to Echo of Tyrande. In our opinion, this is the most difficult encounter of the instance. Before reaching Tyrande, however, you will have to defeat a few easy trash packs.4.4.1. Trash
The trash in the Emerald Dragonshrine takes 90% reduced damage in the shades, which makes it essential to kite them to the white beams of moonlight that appear in random, nearby locations. When inside these beams of light, the damage reduction is removed, enabling the party to kill the trash.It is important that DPS players refrain from attacking the trash when they are not inside a beam so that the tank can easily round them up and kite them to the nearest beam.
4.4.2. Echo of Tyrande
After enough trash mobs have been killed, Echo of Tyrande will spawn and can be engaged. This encounter is all about nuking Tyrande while avoiding her various abilities and interrupting a specific spell cast.Tyrande does not need to be tanked. As such, the tank will only be doing damage and helping interrupt.
 During the encounter, the fighting area is divided in two. Inside the purple halo, your casting speed is decreased by 50%. Outside the purple halo, your casting speed is not affected, but you have more abilities to avoid. Obviously, spell casters need to be outside of the halo.
While Tyrande has many abilities, most of them have obvious visual effects that make them easy to avoid. The only really important ability is
 Stardust. She regularly tries to cast it and your party should try to interrupt the casts. Setting up a rotation is essential to prevent unnecessary damage from this ability.
At 80% health, Tyrande buffs herself (
 Lunar Guidance), reducing the cast time of her spells by 25%. At 55% health, she gains another stack, for an overall cast time reduction of 50%. Interrupting Stardust then becomes increasingly difficult and using
  Bloodlust,
  Heroism, or
  Time Warp is recommended to shorten the remainder of the fight.
At 30% health, Tyrande casts
 Tears of Elune, which causes stars to rain down on the party. As these starts are hard to avoid, this ability constitutes a sort of soft-enrage mechanics (especially when combined with faster casts of Stardust).
Other than Tears of Elune and Stardust, Tyrande uses other abilities, which have obvious visual effects and are easy to avoid.
Moonbolt deals magic damage to her main aggro target.
-
Moonlance: Tyrande fires a moon lance in a direction. The lance then splits into three parts, that continue to travel along the ground. These should be avoided, as getting hit by them deals damage and stuns for 5 seconds.
Piercing Gaze of Elune: causes a few white, swirling void zones to move around the fighting area. These should be avoided, as standing within 6 yards of them deals heavy magic damage and silences spell casting.
4.4.3. Achievement: Moon Guard
The Moon Guard achievement is not part of the boss fight against Echo of Tyrande. Instead, it has to do with the trash preceding the boss.
The achievement requires that your group's healer takes no damage during the trash event (moving from one beam of moonlight to the next while killing adds). The most straightforward way to do the achievement is for the tank to be very careful to quickly get aggro on mobs, and for the healer to not cast any spells right as mobs spawn, so as not to take healing aggro.
There is a trick that can be employed, as well. The achievement detects the "healer" based on their current talent specialisation (Holy, Restoration etc.), and as such it is possible to have your healer go into another specialisation during the trash. While their healing ability will be affected, it will ensure that, if the group survives, you will obtain the achievement.
5. Bronze Dragonshrine: Murozond ↑top
The Bronze Dragonshrine is one you will visit each time you are running End Time. Here, you will have to defeat Murozond, the final boss encounter. Prior to engaging Murozond, you will also have to defeat two packs of dragonkin.5.1. Trash
The trash packs before Murozond are comprised of several dragonkin, including casters. They are susceptible to the usual forms of crowd-control, and while this is useful, it does not appear to be required.5.2. Murozond
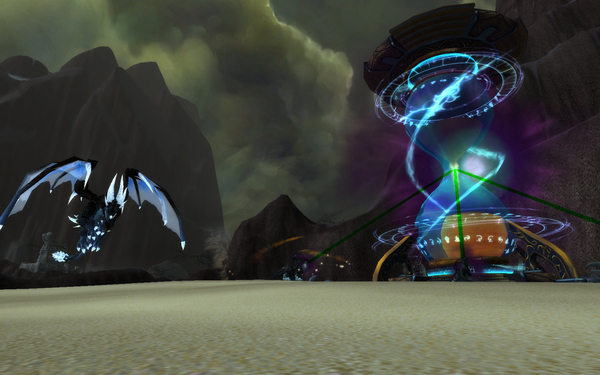 The encounter against Murozond presents an interesting, new type of ability. The boss has a tremendously large health pool for a heroic 5 man boss (almost 20M health), as well as two "soft enrage" style mechanics. In order to overcome this challenge, players will have to make use of an hourglass (a large object located in the center of the fighting area) to turn back time, resetting the encounter entirely, except for Murozond's health.
 The hourglass only has 5 charges. Consuming a charge is done by clicking the hourglass. Ideally, you will want to use the hourglass at 83%, 67%, 50%, 33%, and 17% of Murozond's health. Since using the hourglass resets all your cooldowns, regenerates mana and health, and resurrects dead party members, you should not hesitate to use all your cooldowns at the beginning of the fight and after each use of the hourglass. Also, using the hourglass grants a casting and movement speed increase for 30 seconds through
  Blessing of the Bronze Dragonflight.
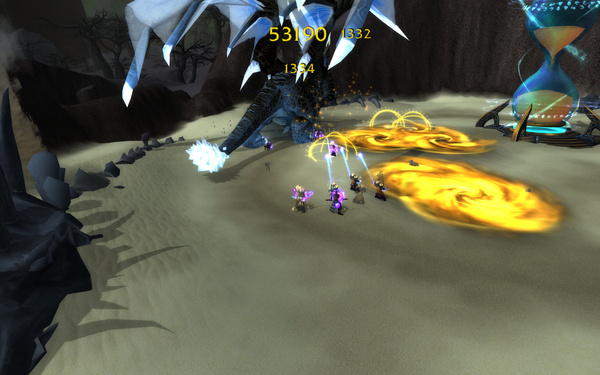 Without the hourglass, the party would quickly get overwhelmed with
  Distortion Bomb. This ability targets a random player and throws a bomb at them that explodes and deals damage upon landing. The explosion creates a damaging void zone on the ground that only disappears when the hourglass is used. Eventually, the entire fighting area around Murozond would get covered, making it impossible to attack him properly.
Healers need to be aware of the
 Temporal Blast. This ability damages party members and stacks a debuff that increases the damage of subsequent applications. Murozond casts it every 15 seconds. The stacking debuff is reset when the hourglass is used.
Tanks need to be aware of Murozond's
 Infinite Breath attack and make sure that the boss never faces the party. The ideal facing is to the side, such that the rest of the party can stand between the boss and the hourglass without getting hit by either his breath or his tail.
Finally, it seems that the frequency with which the boss casts Distortion Bomb increases as the fight goes on, and is unaffected by using the Hourglass. This means that the encounter will become progressively more difficult as Murozond nears death, and at the end, it will be very difficult for players to find any place to stand that is not covered by void zones.
While this was not strictly necessary in our experience, tanks may opt to move the boss around (while still facing him away), to give players a chance to avoid the void zones.